| View previous topic :: View next topic |
| Author |
Message |
chopper
Joined: 05 Sep 2010
Posts: 128
Location: Ireland
|
 Posted: Thu May 19, 2011 11:12 Post subject: Welding chassis this weekend Posted: Thu May 19, 2011 11:12 Post subject: Welding chassis this weekend |
 |
|
Welding chassis this weekend
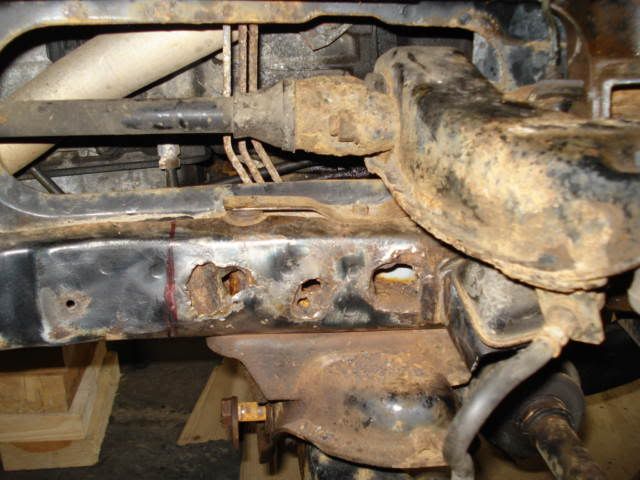
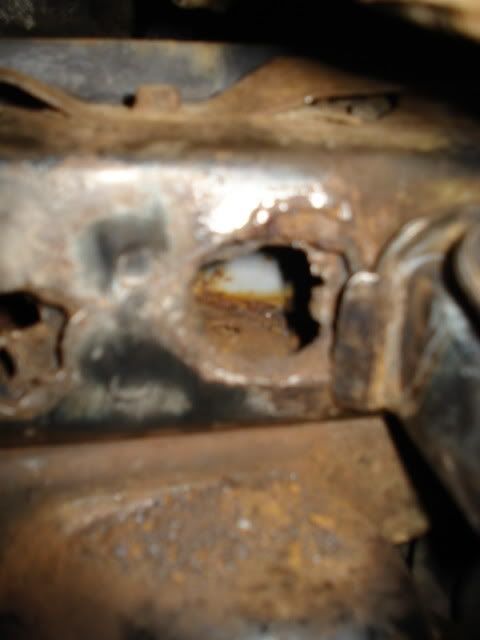
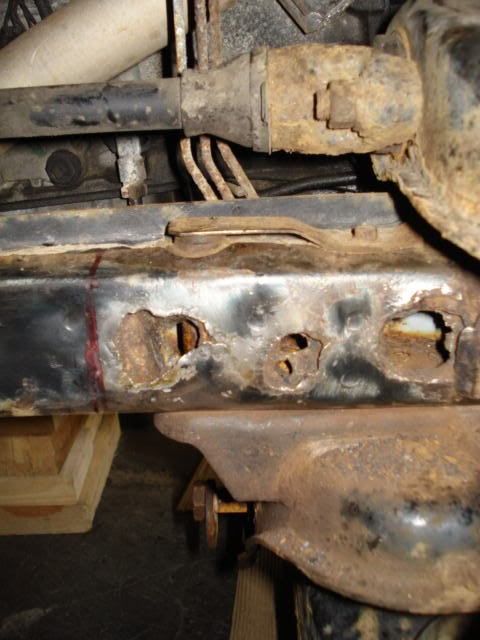
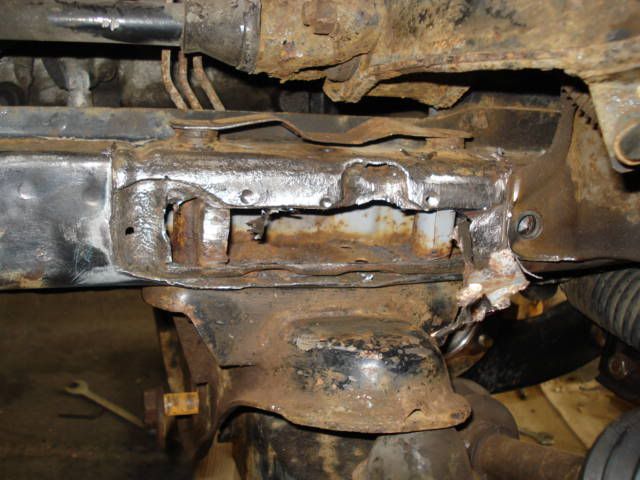
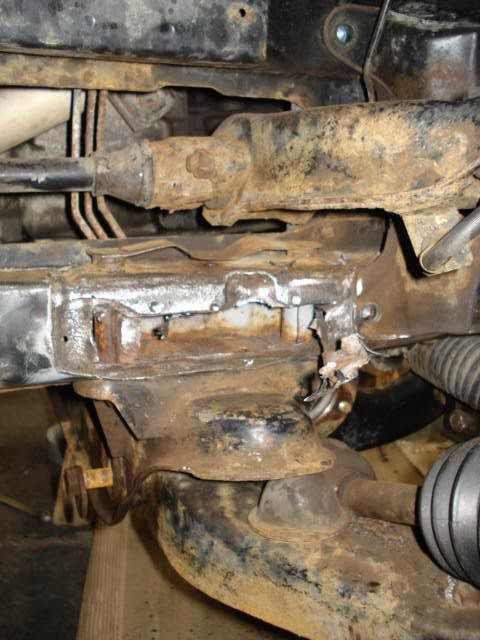
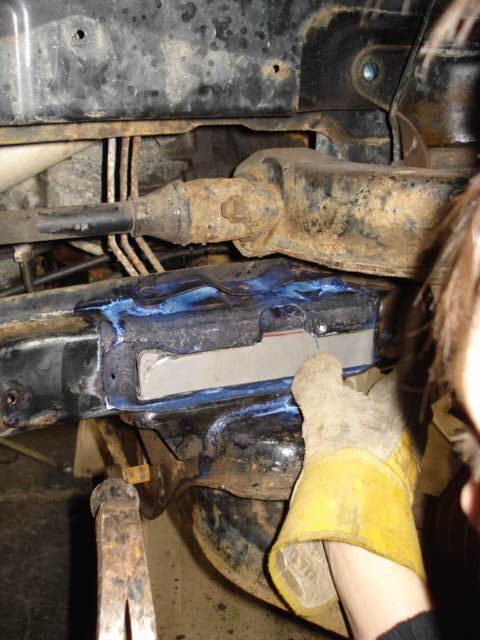
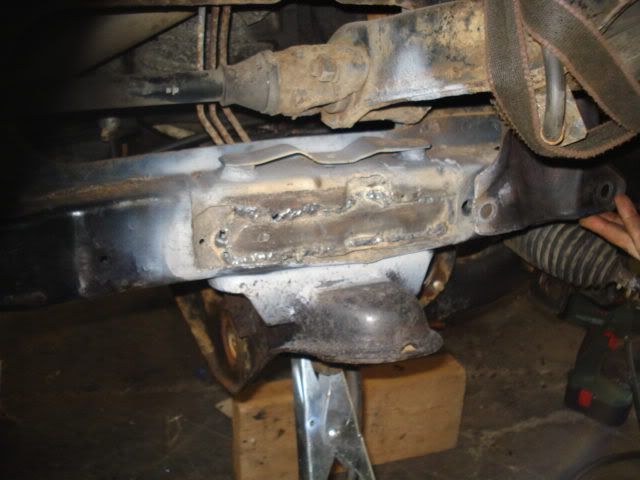
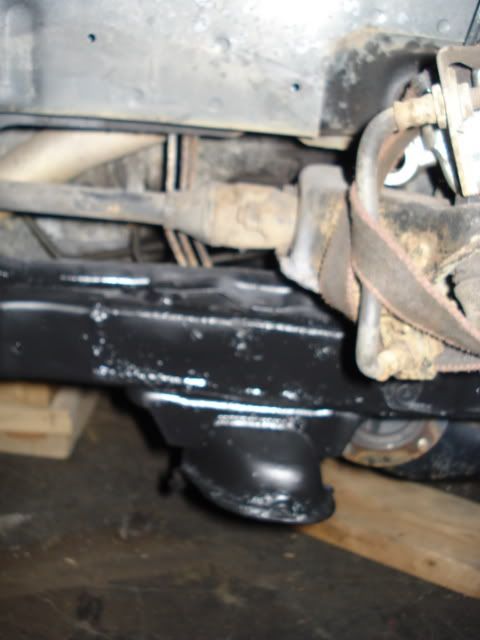
Im welding the chassis on my bus this weekend here are two images of the main area Im going to try and fix you can see there is a hole to the front of the picture
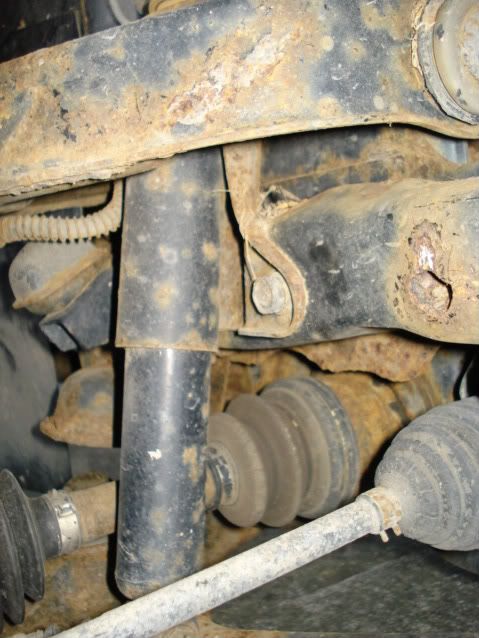
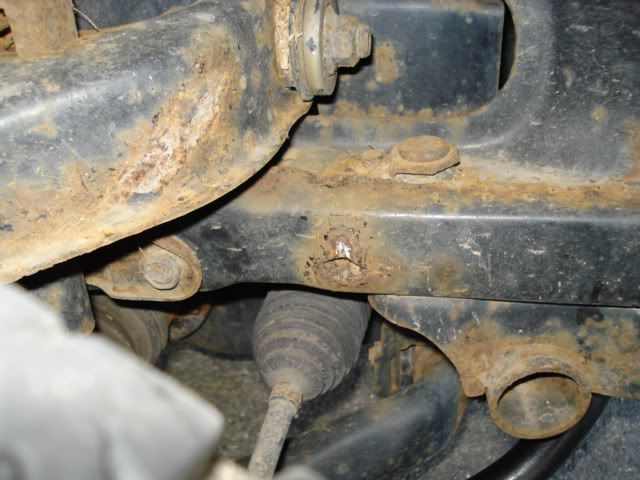
What I want to know is when I grand back all the crap stone chip and rust and start to cut out the dead section to re-weld with 3mm steal plate were should there be hols for the water to get out is there any diagrams should this area to work off.
Im wondering as well ass there seems to be quite a number of layers of steal on top of each other here do I need to try and weld back in a few plates to make the skin of the chassis the same and original or just weld in one patch per area.
And if you were to do this job how much of the wishbones and bracketing would you remove
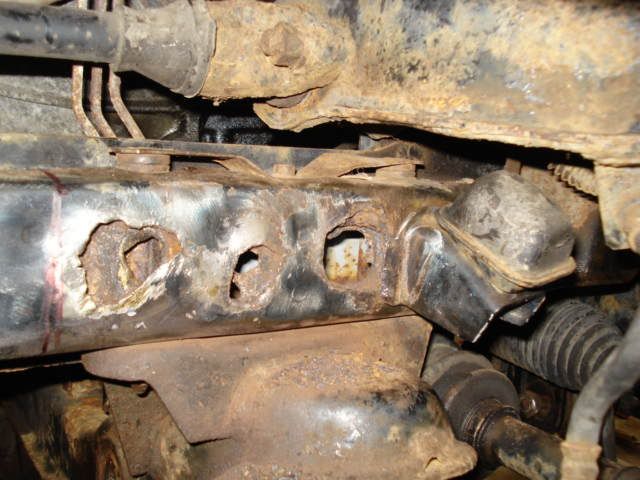
Also the bump stop that is fixed to the wall of the chassis, the top one under the top wishbone seems to peeling of the frame has any one got a good pick of this in good nick so I can see how it should look when try to repair it.
Thanks
Chopper |
|
| Back to top |
|
 |
Google
Sponsor

|
| Posted: Thu May 19, 2011 11:12 Post subject: Google Ads keep this community free to join! |
|
|
|
|
| Back to top |
|
|
gnomebase
Joined: 21 Aug 2006
Posts: 366
Location: London
|
| Posted: Thu May 19, 2011 11:55 Post subject: |
|
|
WRT to new drain holes and multi layer approach, see my previous post on your previous thread.
When I did it I had the engine and the engine subframe off, along with the inner engine bay strenthening plates, and the shock absorber and their mounts.
I was fortunate not to have to undo the tortion bar assemby as the rust was not near any component. |
|
| Back to top |
|
|
Deker
Joined: 08 Mar 2008
Posts: 3833
Location: Borehamwood
|
| Posted: Fri May 20, 2011 2:58 Post subject: |
|
|
3mm steel is a bit OTT, you should replace metal thickness "Like for like"
And NO to double layers, it promotes rust 
You ask -
"And if you were to do this job how much of the wishbones and bracketing would you remove"
Answer = As much as needed for access.
HTH
Deker |
|
| Back to top |
|
|
James22sniper

Joined: 08 Mar 2007
Posts: 286
Location: BUCKS / OXON
|
| Posted: Fri May 20, 2011 9:49 Post subject: |
|
|
| Be intersesting to see the results on Monday! What sort of welder do you use? I bought a cheap n cheerful gas/no gas mig from screwfix some months ago and it has been great so far! |
|
| Back to top |
|
|
buzr6mille
Lifetime member


Joined: 11 Jul 2009
Posts: 6879
Location: Wherever i park up.
|
| Posted: Fri May 20, 2011 10:58 Post subject: |
|
|
Once you start cutting the metal away you will find the hole will get 2 or 3 times the size before you find any good metal to weld to
Don't try and just weld to rate time and effort.
Like I said before.best of luck if you think you can do it in one w/kend.
And I'd use 2mm steel, gasless mig don't give such a good looking finish but if used correctly gives a good weld and is best if you weld outside
_________________
2nd gear low and go go go!
It's A Shame That Stupidity Isn't Painful..
One dent at a time... |
|
| Back to top |
|
|
chopper
Joined: 05 Sep 2010
Posts: 128
Location: Ireland
|
| Posted: Fri May 20, 2011 14:04 Post subject: Thanks guys |
|
|
Thanks for all the advice guys and it all makes a lot of sense.
Ive just been to have a chat with 17years experience Mitsi mech for a chat about what Im trying, and gave me a few good tips to boot
One main one he mentioned is to try and get the engine lifted with out taking it out to far to get some access to the inside (engine side) of the chassis and hope that its not holed and a good grind back and treatment might get you away but if not that when the job gets crazy and like you guys said it and engine out job.
Ive also been told that its very important that the back or inside of the patches Im adding as well to stop rust in the inside and what he told me is only take out the bare minimum to get back to clear metal to weld to but say and plan that after you put in a patch that you try and spry the hell out of the back of it with lads of something like aniti rust treatment then aniti rust primer and then stone chip and wax oil after all that so that the internal welds dont just start to rust from the inside and make thing worse.
He also told me he has seen many of the L400s with the front of the chassis bent up of crumbling after off-roading when the chassis was a little rusty or just from over cooking a jump of some thing and he has upgraded a few before with straightening for a few that went over landing he has told me he has some plans for this some were and is going to get them to me but also ran me true the general idea of adding more strength to the front of the chassis and how to make other good points to use as additional fixing points for much larger longer bash plates to protect the likes of the at box and the way he described it sounded quite a easy build out of some tube or I section steal and good 5mm sheet steel but you would need to get them made up form some were with a press or be up for a lot of cutting a welding instead which is the way he did his first one and then had a company make an other version for an other client a few years later but this was back in 1998
One other tip he told me was that its best to get a job done on the fuel pump if Im lifting the engine as it needs to be moved any way so better to get at it while you can and I dont think mines been done so its time.
So ill try and take as much photos as I can as we work on it tonight and over the rest of the weekend
Thanks
Chopper |
|
| Back to top |
|
|
James22sniper
Joined: 08 Mar 2007
Posts: 286
Location: BUCKS / OXON
|
|
| Back to top |
|
|
chopper
Joined: 05 Sep 2010
Posts: 128
Location: Ireland
|
| Posted: Sun May 22, 2011 19:43 Post subject: okay guys ogt it done (mostly) |
|
|
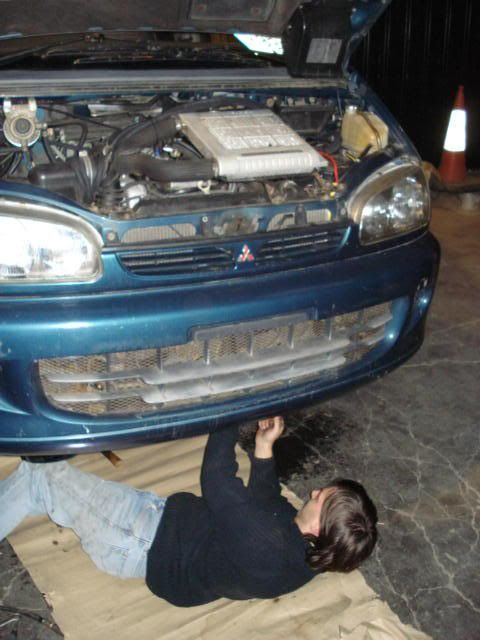
I started work with two mate at about 8pm on Friday eve we worked till about 11:45 that eve and started work on Saturday morning at about 10:30 we were still there at 2am Saturday night.
First job was to unload all the gear
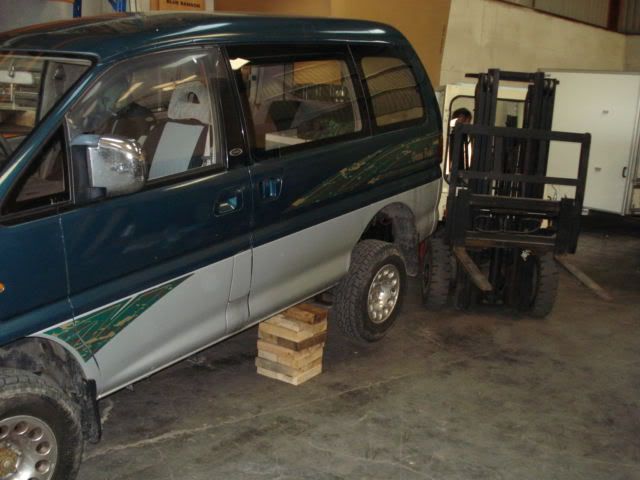
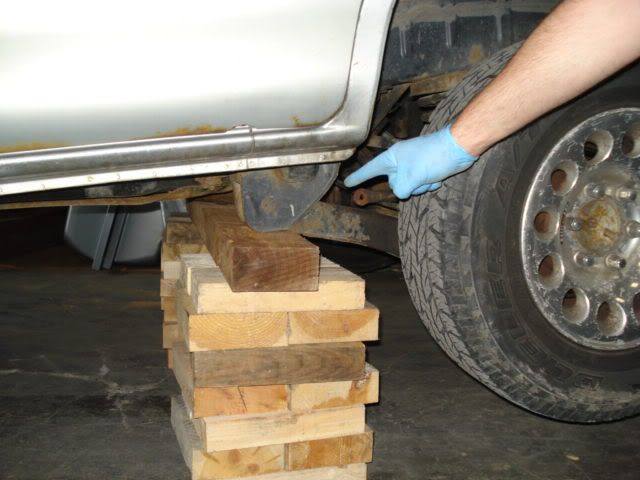
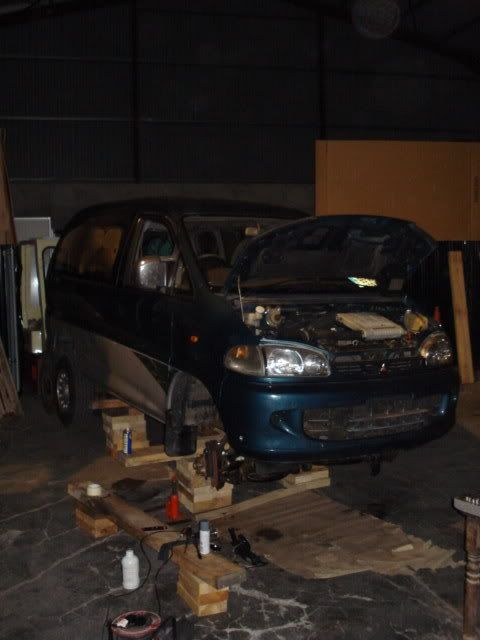
then we lifted the Delica up on blocks of timber with fork truck (don't try this at home folks)
then started to strip the first wish bone when i hit our first big issue
the bolt on the drivers bottom bushing at the front had rusted it self 100% to the inside of the steal tube in the bush
after all but a ox touch (didn't have one) brought us to 11.
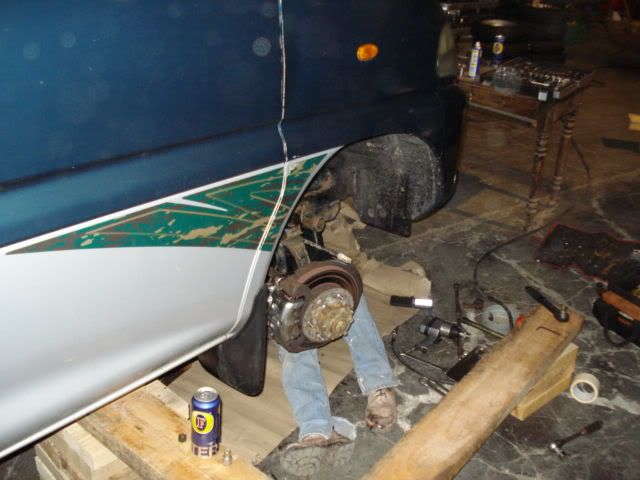
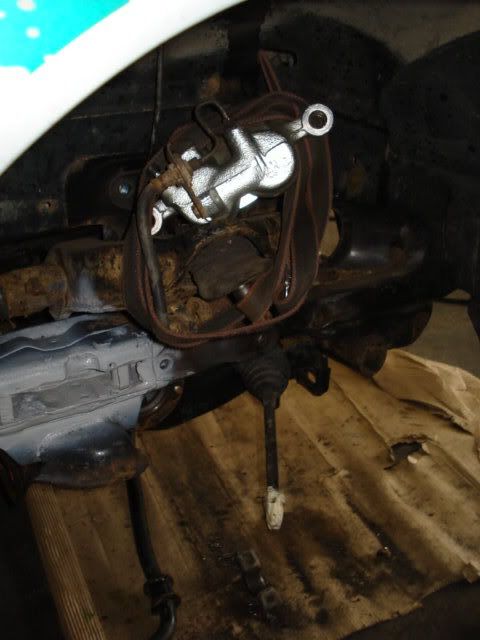
when we kicked of next day we decided to just cut the bolt (bus is in a friends warehouse and is about 50k form my home but needs to be gone for Monday and no body wants to work Sunday either) and if needs be we could rebuild and park it out of the way out side and wait for bolt or try and temp generic bolt if we could get one (were in a very remote rural area as well) striped the rest of the both sides wish bottom wish bones, hubs, drive shafts, mud flaps and shockers removed as well as torsion bar released, calipers strapped up on top of the top wish bones out of the way and and shocker brackets bolts taken out for a bit more room aroud the top wish bone bump stop.
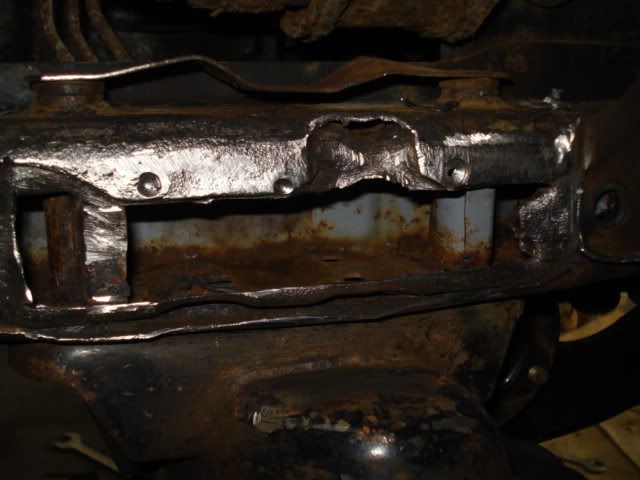
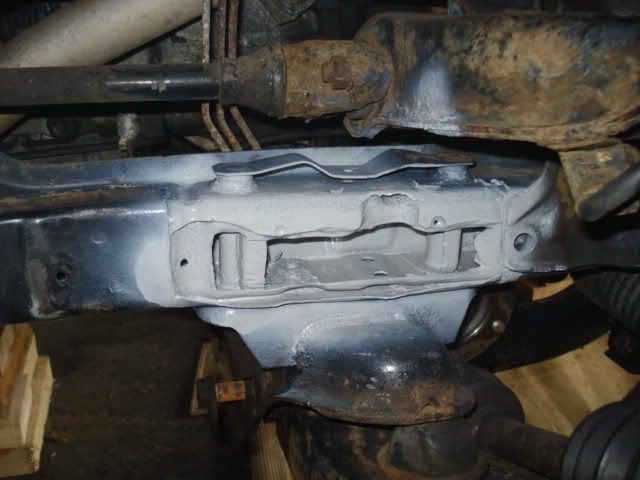
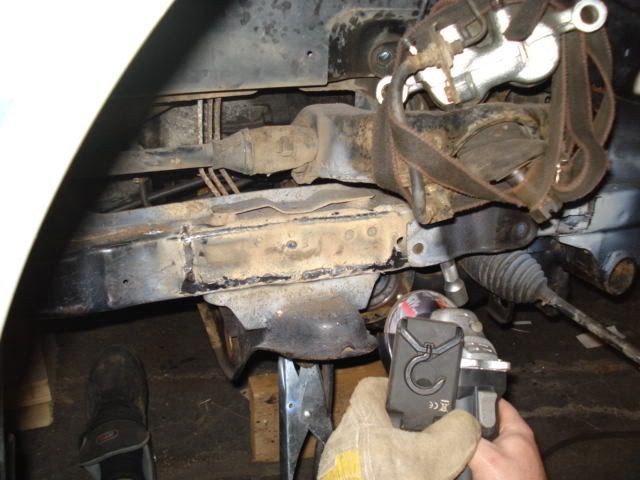
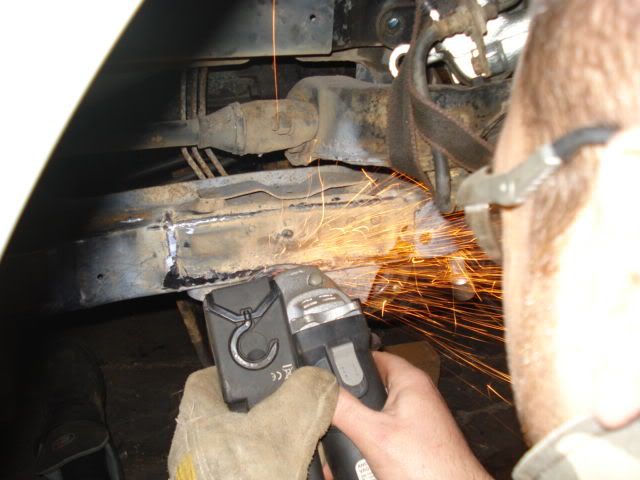
then we started with the areas of damage were being cleaned back an rust being cut out and ground back the top wish bone on the drivers sides bump stop had popped its weld and needed to be removed
we then started to clean grind and treat the area with lots of anti rust treatment then several layers of anit rust primer which we sprayed around the areas of the inside of the chaises areas we had exposed building up 3 or 4 coats over a few hours
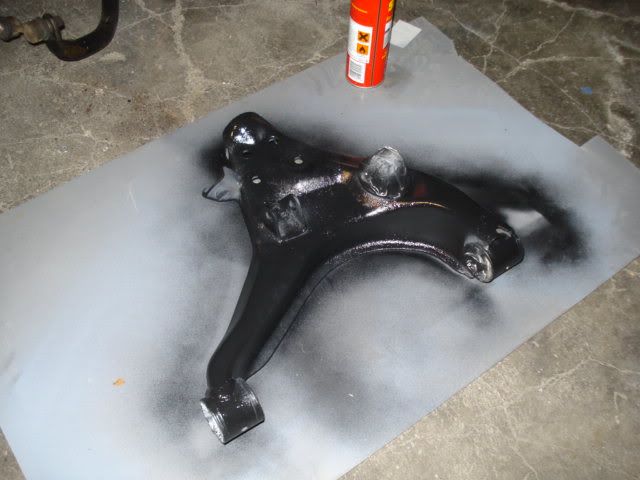
the wish bones were wire brushed and primed and thinly coated in stone chip (more later but budget means this is a repair mission)
we started to try to remove the bottom wish bone bushes (with out a blow touch) we got a drill and drilled out most of the rubber then bashed the shouldered end of the bush in on it self with a chisel and then from the access hole in the side of the bush housing on the wish bone with a pointy drift which helps crush the bush then hammered out with a large socket and lump then to refit a 16 ton bottle jack and a compression frame and some neat fitting sockets
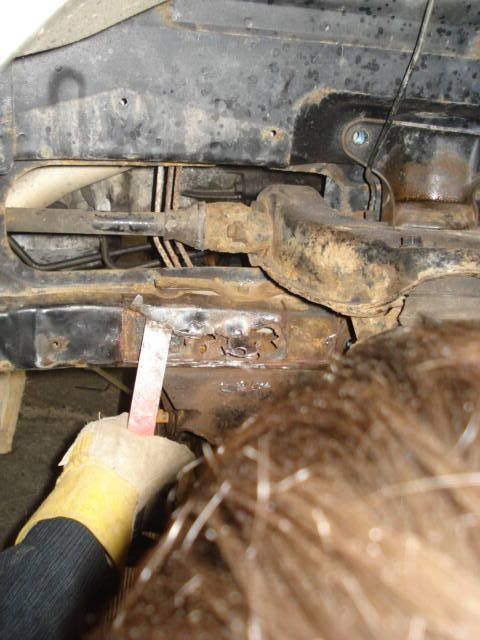
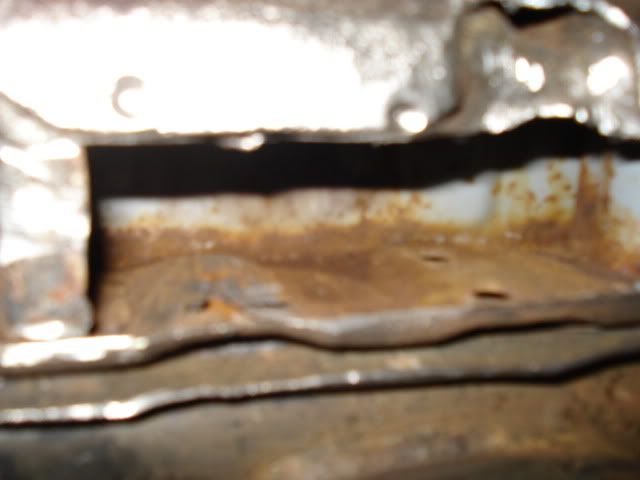
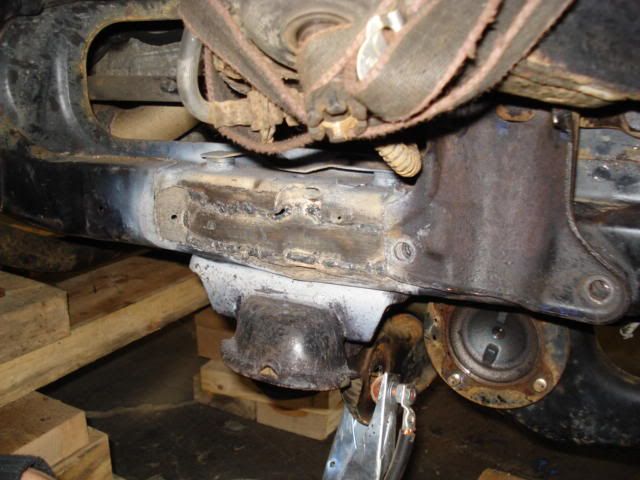
the damage to the drivers side chassis was a lot worse than it looked from the out side and had to have a large section to be removed and two layers of metal as well we made the call to ad two layers of patch but painstakingly treated the areas with anti rust and primed twice over grinding and welding a few times (took ages good tip is to have a lot of grinding disks and don't be scared to grind most of the weld away a few times to get strength, I didn't car what it looked like but how pure and strong it was
then of course a good cover of primers and stone chip (again ill be building up a few layers over the next few weeks) it got about 3 primes and 4 stone chip coats in the main work area (ill be cleaning and spraying most of the area over time a little at a time)
then reassembly we had to use a m12 as a wish bone bolt as it was all we could get we replaced the track rod ends and track rod gaiters as well as the ball joints anti roll bar drop links were not unbolting so needed to be cut of so had to leave the front anti roll bar of as well till i get some new ones top ball joints well need doing but only as there bolts at the top were snapping bottom ball joints are also needing
here a few picks we took as we worked we lifted the van up on blocks about 2 foot in the air
then the
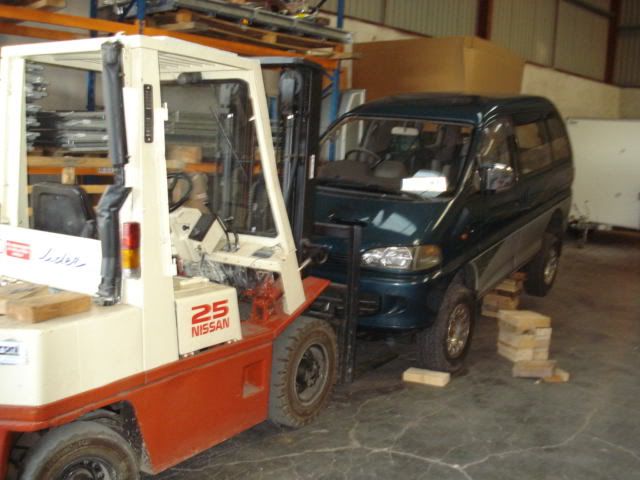
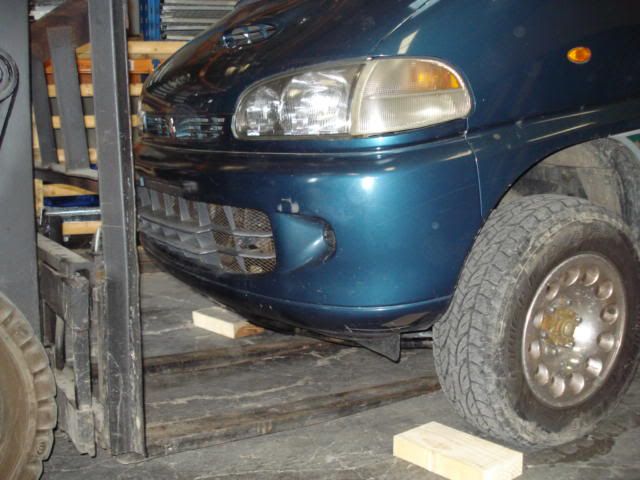
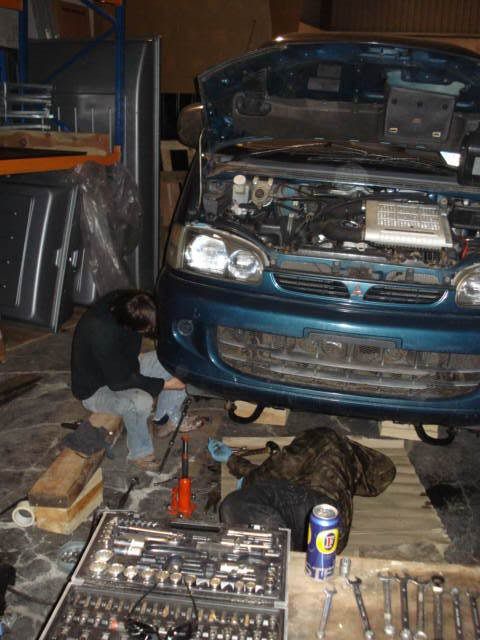
[img][/img] |
|
| Back to top |
|
|
Ronnie
Joined: 02 Aug 2006
Posts: 355
Location: UK
|
| Posted: Sun May 22, 2011 22:20 Post subject: |
|
|
Outstanding!
Nice jack too  |
|
| Back to top |
|
|
Ange
Joined: 03 Dec 2008
Posts: 1302
Location: Swadlincote
|
| Posted: Sun May 22, 2011 22:44 Post subject: |
|
|
Can't believe the rust on those pics...
At least now it will please the MOT man for a few more years...
Ang x
_________________
 |
|
| Back to top |
|
|
John64
Lifetime member

Joined: 10 Oct 2008
Posts: 876
Location: Liverpool, Scouser, northerner, Evertonian.
|
| Posted: Mon May 23, 2011 1:21 Post subject: |
|
|
Dear me, How Much Rust! Job well done there,
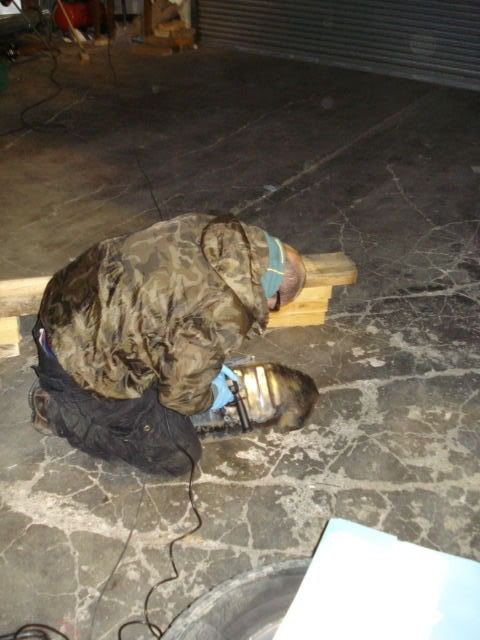
did you know there is a dead guy with a Camo Jacket on under your Deli
_________________
John (LTM 158)
L400 Crystal lite roof. Green/Grey. With Mods
Sometimes I'm Here ;-) Sometimes I'm Not 
"CELER ET AUDAX" |
|
| Back to top |
|
|
Deker
Joined: 08 Mar 2008
Posts: 3833
Location: Borehamwood
|
| Posted: Mon May 23, 2011 1:51 Post subject: |
|
|
Nice job, used to do a lot of that 30 years back I know how you must feel after that work
| John64 wrote: |
| did you know there is a dead guy with a Camo Jacket on under your Deli |
Nah - he's not dead - - - note the cans of -  Release Agents - with a big F on them - All those fumes 8-) Release Agents - with a big F on them - All those fumes 8-)
Deker |
|
| Back to top |
|
|
Keefe
Lifetime member

Joined: 09 Sep 2006
Posts: 1099
Location: Barnsley, Good Ol' Yorkshy
|
| Posted: Mon May 23, 2011 7:59 Post subject: |
|
|
He's not dead, he's resting after having a long grind.
Beautiful plumage.
 |
|
| Back to top |
|
|
chopper
Joined: 05 Sep 2010
Posts: 128
Location: Ireland
|
|
| Back to top |
|
|
chrisfoster1971
Lifetime member

Joined: 31 Aug 2007
Posts: 1536
Location: Sutton In Ashfield, J28 M1
|
| Posted: Thu Aug 25, 2011 23:30 Post subject: |
|
|
Just come across this thread and crapping it as ours just failed its MOT today with both front and rear chassis corrosion.
Locations look very similar at the front... its a pity as I love my bus and it is worth loads to me but without an MOT its worthless.
Nipping round to friendly welder tomorrow night who'll have a look and see what the damage is. But already dreading the outcome after seeing these pictures.
_________________
100% BIO DIESEL ! Well not quite at the moment
My Delica Album |
|
| Back to top |
|
|
buzr6mille
Lifetime member
Joined: 11 Jul 2009
Posts: 6879
Location: Wherever i park up.
|
| Posted: Fri Aug 26, 2011 0:16 Post subject: |
|
|
| chrisfoster1971 wrote: |
Nipping round to friendly welder tomorrow night who'll have a look and see what the damage is. But already dreading the outcome after seeing these pictures. |
Sorry, but it maybe cheaper to buy another Delica! I do hope I'm wrong 
_________________
2nd gear low and go go go!
It's A Shame That Stupidity Isn't Painful..
One dent at a time... |
|
| Back to top |
|
|
chrisfoster1971
Lifetime member
Joined: 31 Aug 2007
Posts: 1536
Location: Sutton In Ashfield, J28 M1
|
| Posted: Fri Aug 26, 2011 0:19 Post subject: |
|
|
I do as LWB in Black over silver seem quite rare..
Time will tell
_________________
100% BIO DIESEL ! Well not quite at the moment
My Delica Album |
|
| Back to top |
|
|
buzr6mille
Lifetime member
Joined: 11 Jul 2009
Posts: 6879
Location: Wherever i park up.
|
| Posted: Fri Aug 26, 2011 0:27 Post subject: |
|
|
I had my rear chassis done where the bump stops went thru, it cost me £150 to get fixed.
_________________
2nd gear low and go go go!
It's A Shame That Stupidity Isn't Painful..
One dent at a time... |
|
| Back to top |
|
|
|


