
|
Mitsubishi Delica Owners Club UK
Mitsubishi Delica L300, L400 and D:5 Owners Club
|
| View previous topic :: View next topic |
| Author |
Message |
Pierre
Lifetime member

Joined: 09 Jan 2014
Posts: 151
Location: Northampton
|
 Posted: Sun Aug 26, 2018 23:04 Post subject: Eureka Delica - my LWB project Posted: Sun Aug 26, 2018 23:04 Post subject: Eureka Delica - my LWB project |
 |
|
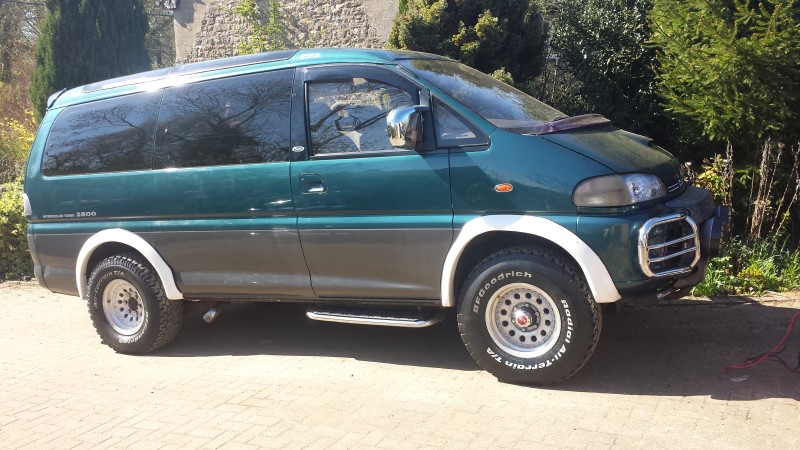
It all started a couple of years ago on the M5 coming back from a holiday in Cornwall.
Transporting grandkids and the odd parent or two plus all their paraphernalia, an intermittent, unwelcome noise started in the front axle.
Having made it home, the LWB was put in the garage and the front wheels removed. It stayed on blocks for 2 years whilst house renovations took priority.
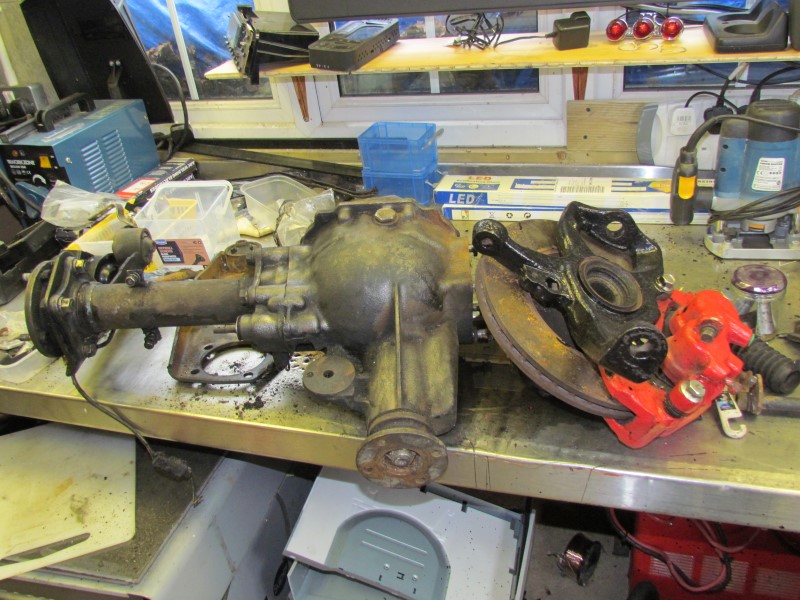
With the house finished (almost) work on the Delica started and the n/s front hub was stripped and removed to reveal a misplaced bronze shim.
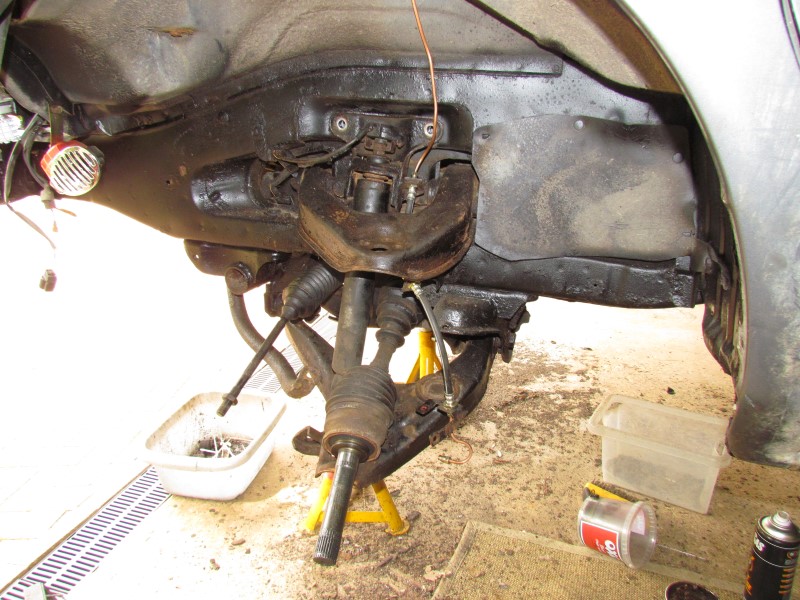
Also revealed was rust and some weary bushes on the engine bearers so out came the front axle.
Rust!
With the axle out, why not remove the gearbox crossmember, see what's in the gearbox sump and change the filter?
Gearbox fluid was somewhat dark and sludgey.
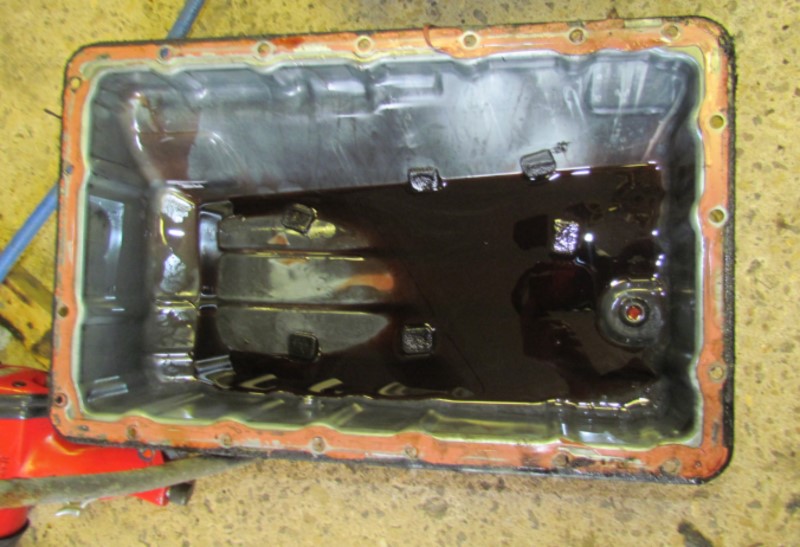
Filter a bit dark also.
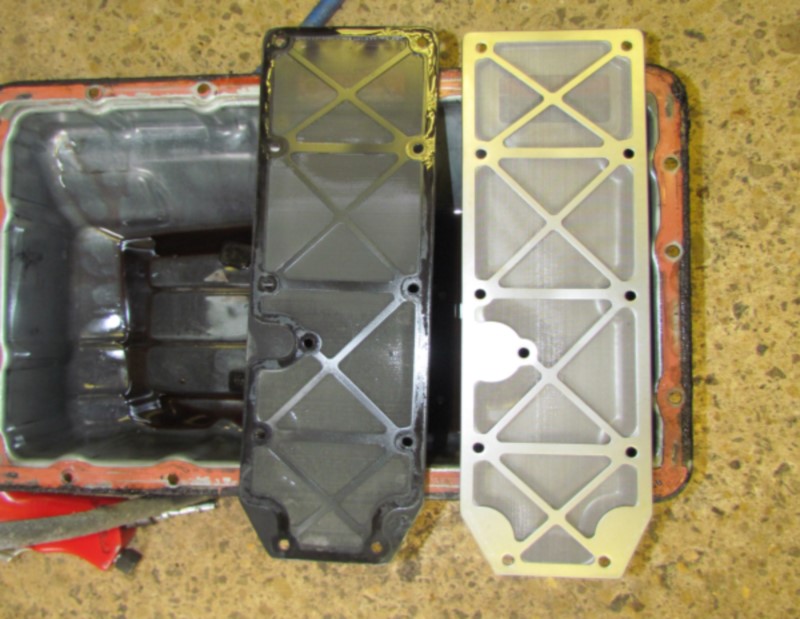
The filter was replaced, sump cleaned and reinstalled with new bushes on the crossmember.

Attention now turned to the rust and more posts will follow as work progresses.
_________________
Talk the torque
Delica Super Exceed LWB PF8W
Suzuki Grand Vitara V6
Sunbeam Tiger 289
Benelli 750 SEI |
|
| Back to top |
|
 |
Google
Sponsor

|
| Posted: Sun Aug 26, 2018 23:04 Post subject: Google Ads keep this community free to join! |
|
|
|
|
| Back to top |
|
|
sl8ter
Joined: 03 Aug 2010
Posts: 326
Location: Dumbarton
|
| Posted: Mon Aug 27, 2018 17:51 Post subject: |
|
|
| I'm also an lbw owner so looking forward to more posts. lots more to come I think lol |
|
| Back to top |
|
|
Pierre
Lifetime member
Joined: 09 Jan 2014
Posts: 151
Location: Northampton
|
| Posted: Thu Sep 06, 2018 21:22 Post subject: Eureka Delica - next phase |
|
|
With the front axle removed and suspension stripped, suspension bushes were replaced together with those on the cross members the including the rear gearbox mountings.
With the aid of a six ton press, most bushes were replaced without too much trouble although Lewis's method was used for the differential mount bushes.
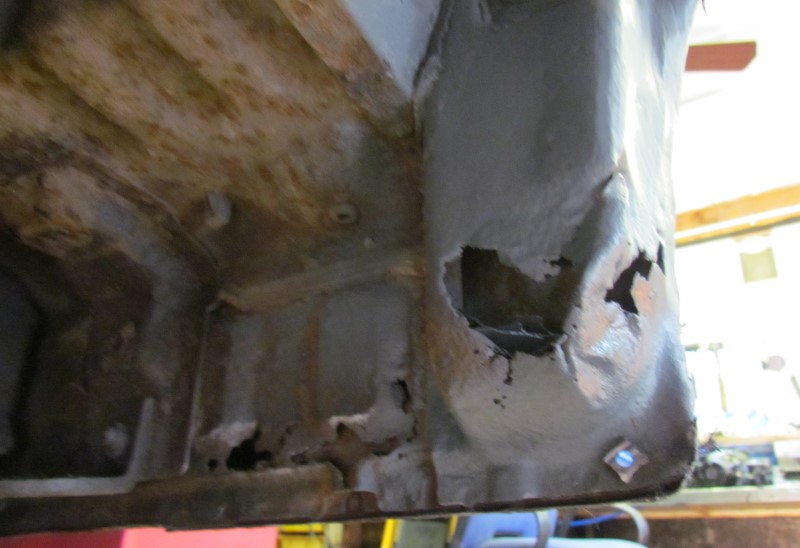
Next came welding. As shown the the earlier pictures, the engine bearers had some corrosion whilst the lower door pillars ("A" frames?) were severely rusted away.
The localised corrosion to engine bearers was cleaned off with an aluminium oxide flap wheel in a grinder and then cut back to sound metal. The inner metal skin appeared sound but everywhere was treated with Aquasteel rust converter followed by several coats of Pro-Cote Cold Galv Spray from a rattle can.
As corrosion to engine bearers was localised, oversized plates were welded on.
The lower door pillars were more of a problem. Again the bad areas were cleaned, cut back and treated. Lacking the facilities to fabricate a correct profile, the repair was by tack welding small pieces of plate to form the section, then seam welded
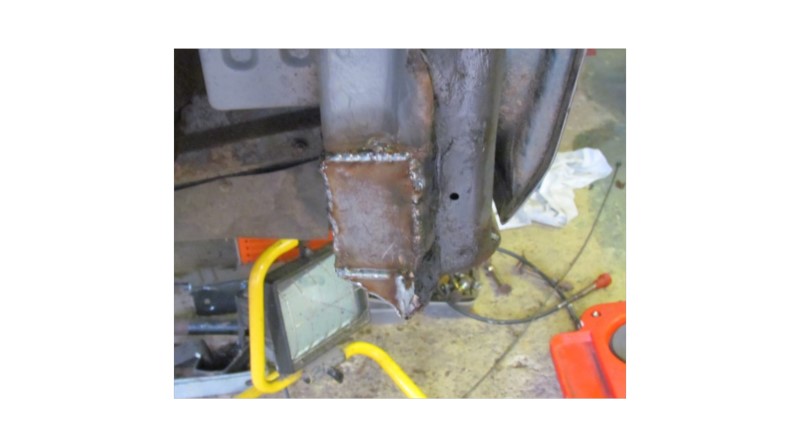
The same technique was used on the offside pillar.
After coating with Aquasteel and Cold Galv Spray, the repaired area received a good coat of Hammerite black gloss.
Now welding to the front was finished, the rebuild can start.
_________________
Talk the torque
Delica Super Exceed LWB PF8W
Suzuki Grand Vitara V6
Sunbeam Tiger 289
Benelli 750 SEI |
|
| Back to top |
|
|
Green Grouch
Lifetime member
Joined: 14 Feb 2012
Posts: 1264
Location: Dorset
|
| Posted: Thu Sep 06, 2018 21:35 Post subject: |
|
|
Great Post and Good work 8-)
Nice neat welding also for out of position on your last picture
Keep up the pictures - always appreciated 
_________________
A Little Knowledge is Dangerous and expensive! especially if your me Mending anything!! |
|
| Back to top |
|
|
DoriDorito
Joined: 16 Dec 2017
Posts: 44
Location: Dublin
|
| Posted: Sun Sep 09, 2018 10:13 Post subject: Re: Eureka Delica - next phase |
|
|
Nice, keep the pics going, thanks :D
| Pierre wrote: |
| ... although Lewis's method was used for the differential mount bushes. |
What method is that? |
|
| Back to top |
|
|
YOZA

Joined: 07 Mar 2005
Posts: 2423
Location: The centre of the universe
|
| Posted: Sun Sep 09, 2018 11:52 Post subject: |
|
|
I love these back from the dead posts, its like watching a surgeon on discovery Chanel piece together a shattered leg. :D
I had a bit done to mine - each end of each sill, but I was only the plate holder, my friend gave me a hammer and said press there with the wooden end, then he welded me and the plate. 
Keep up the post and pictures, I know it is so easy to just say flip it and steam ahead with the job, it takes a lot to stop, photograph and document what you are doing, then convert it into a legible post here all for the good of others.
The worst part for me is pausing for a picture break when making good progress then having to wash up and tidy round the area being pictured.
_________________
Artificial intelligence is no match for natural stupidity.... |
|
| Back to top |
|
|
Deker
Joined: 08 Mar 2008
Posts: 3833
Location: Borehamwood
|
| Posted: Sun Sep 09, 2018 18:08 Post subject: Now stop it rusting further |
|
|
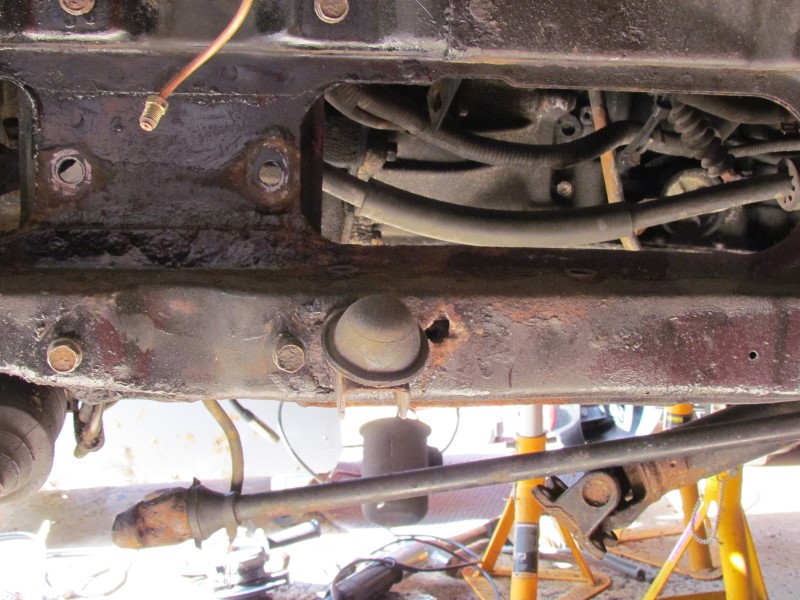
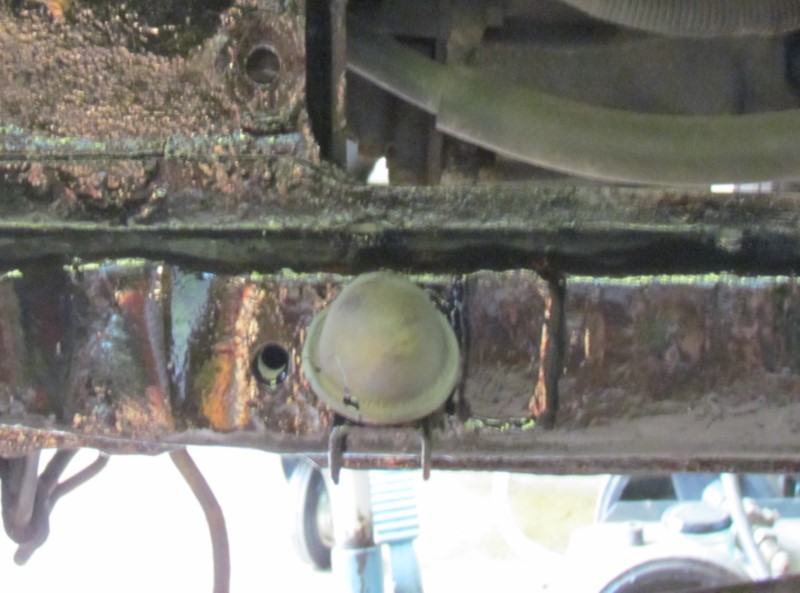
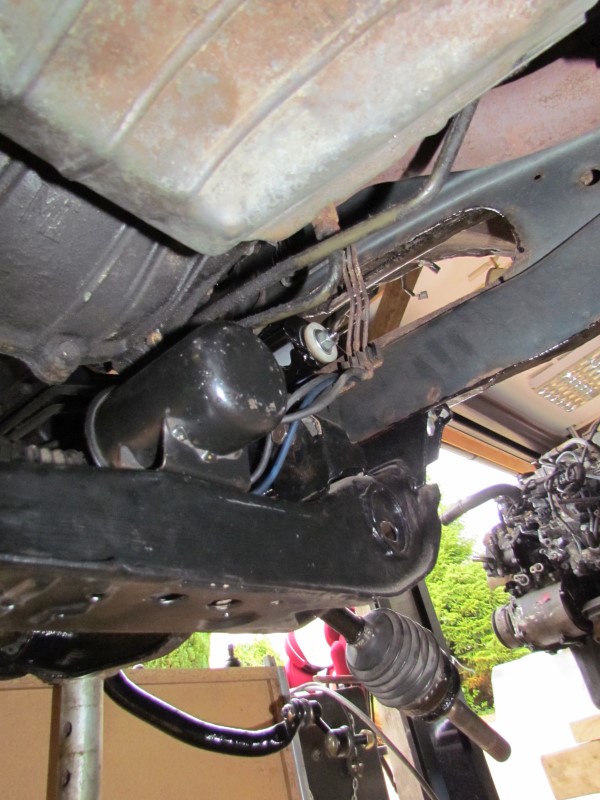
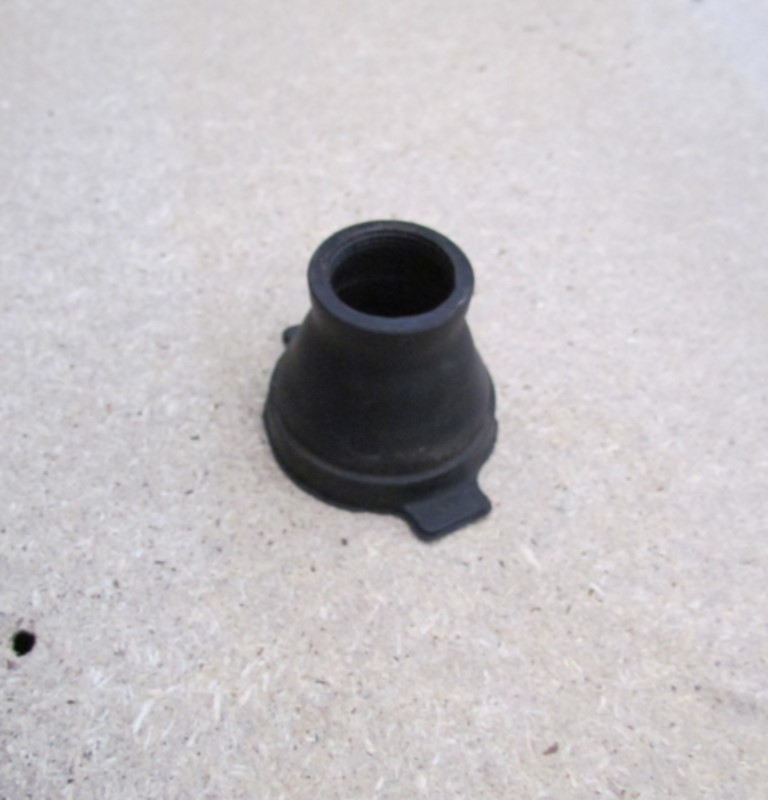
As per the title -
In your last pic, near the top you see the rubber bung, these bungs are fitted in all box sections (except chassis  ) )
Go here, to see what to do, to preserve your Delica.
http://www.MDOCUK.co.uk/forums/viewtopic.php?p=393522#393522
After drilling the chassis. I reckon treat once per year, a Deli should never rust.
Mr D |
|
| Back to top |
|
|
Pierre
Lifetime member
Joined: 09 Jan 2014
Posts: 151
Location: Northampton
|
| Posted: Tue Sep 11, 2018 19:29 Post subject: Eureka Delica |
|
|
Thanks Mr D.
Your recommendations will be implemented once the welding etc. is complete.
Currently re-assembling all the front suspension and brakes.
More piccies soon.
Regards
P
_________________
Talk the torque
Delica Super Exceed LWB PF8W
Suzuki Grand Vitara V6
Sunbeam Tiger 289
Benelli 750 SEI |
|
| Back to top |
|
|
Pierre
Lifetime member
Joined: 09 Jan 2014
Posts: 151
Location: Northampton
|
| Posted: Tue Sep 11, 2018 19:33 Post subject: Eureka Delica |
|
|
Hi DoriDorito,
Check out www.MDOCUK.co.uk/forums/viewtopic.php?t=46752 - courtesy of Lewis.
Regards,
P
_________________
Talk the torque
Delica Super Exceed LWB PF8W
Suzuki Grand Vitara V6
Sunbeam Tiger 289
Benelli 750 SEI |
|
| Back to top |
|
|
DoriDorito
Joined: 16 Dec 2017
Posts: 44
Location: Dublin
|
| Posted: Wed Sep 12, 2018 22:18 Post subject: |
|
|
Oh very good, thanks very much for that.
Lewis,  |
|
| Back to top |
|
|
Pierre
Lifetime member
Joined: 09 Jan 2014
Posts: 151
Location: Northampton
|
| Posted: Mon Sep 17, 2018 22:19 Post subject: Eureka Delica - work continues |
|
|
A much earlier task was to replace the front brake lines in copper. Now seen a sensible move as trying to feed semi-rigid copper pipe through the wheel arches into an engine bay of a jacked-up Delica would have been fraught.
Numerous bits and pieces were purchased in readiness for the rebuild throughout the time the Delica was on blocks. These were stored in the garage along with Sunbeam Tiger bits, Benelli spares and many items for the ongoing garden and house renovation. Later considerable searching was necessary to locate the Delica goodies.
It quickly became apparent that rebuilding a Delica was not as easy as stripping one down.
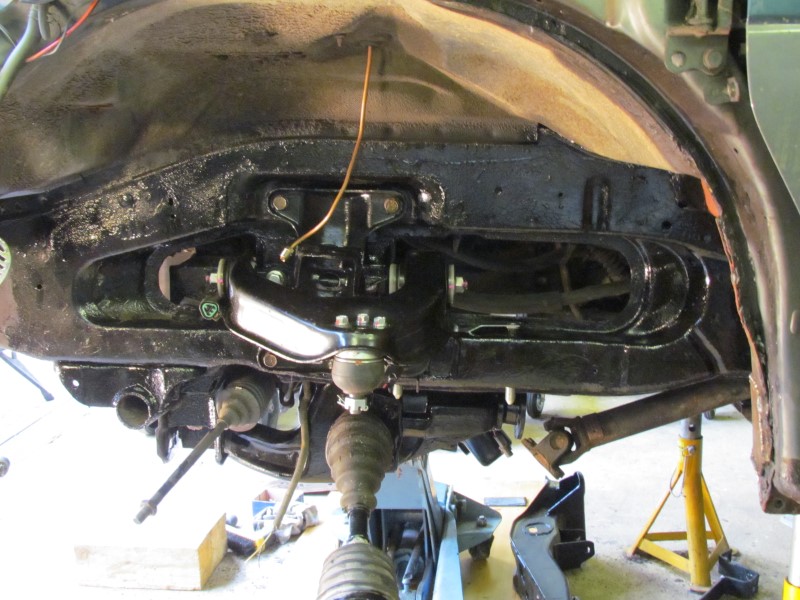
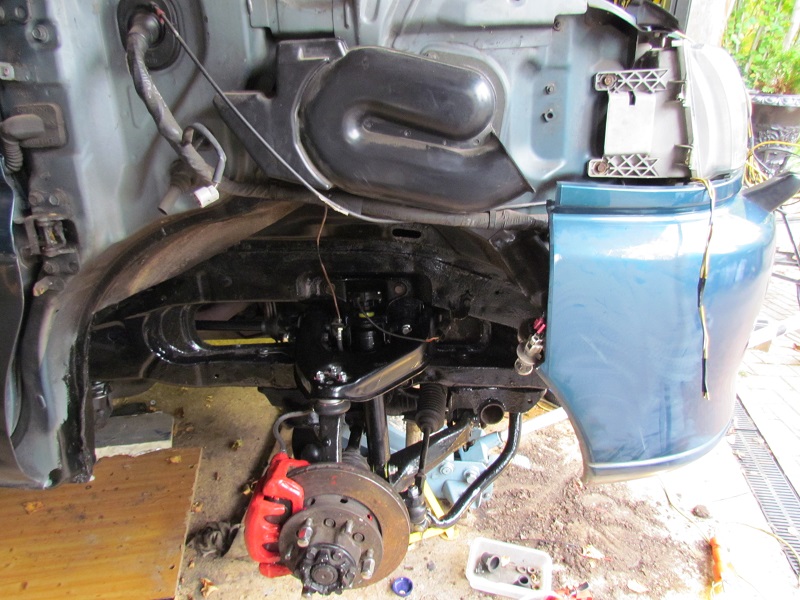
First task was installing the engine bearer cross member, not too difficult although applying torque to the large fasteners was challenging when working from a prone position. The small vacuum reservoir then being added.
Next the axle - a heavy piece requiring a large trolley jack to lift it into a rough position. Much manoeuvring and juggling followed before the first fastener could be installed, all the time balancing the axle on the jack. Once the first bolt was placed, axle location was easier and the remaining bolts went in without too much fiddling.
About this time, a decision was made to replace the torsion bars with Ironman units so the originals were taken out. The rubber gaiters protecting the torsion bar splines had started to split so new ones were ordered from the local Mitzi dealer - £15 each and 4 required!
Concentrating on the near side a new upper wishbone complete with ball joint was easily bolted in. Intending to replace ball joints and bushes throughout, upper wishbone bushes however were rarer than rocking horse poo. Eventually, genuine Mitsi wishbones complete with bushes and ball joints were purchased from Milners at reasonable cost.
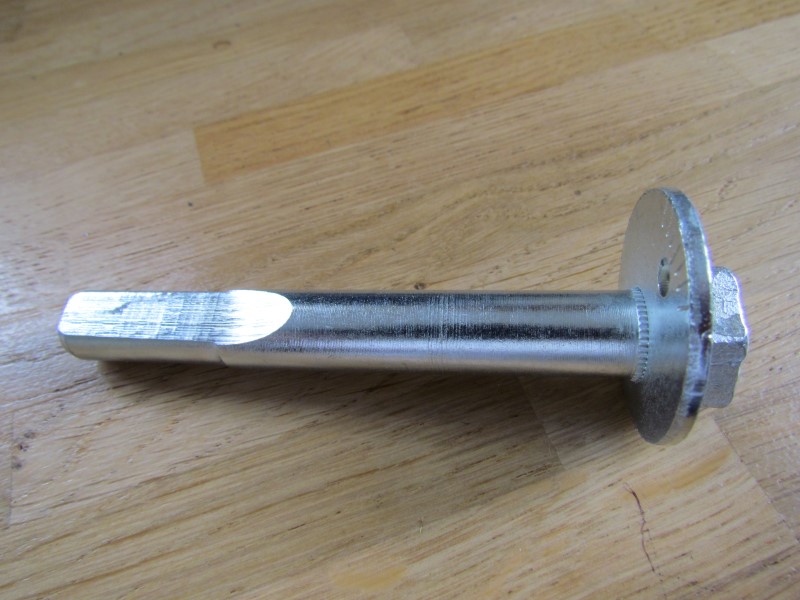
Installing a refurbished lower wishbone complete with new ball joint then started. After easing it into position, it became apparent front and rear cam bolts differed. Different length, different diameter, different cam washer. Fortunately, both sizes were found amongst the stored purchases and the installation was completed.

The Ironman bars arrived from West Coast Off Road with an abrupt realisation that instructions on installation and setting up were not included. Quickly checking the Ironman web page discovered absolutely nothing.
No alternative but crawl under the spare Delica, examine the torsion bars, then unwind one while counting the turns. The idea being to get some idea how each bar end fitting lined up.
Back under the LWB with the new torsion bars, again near-side first. But how to get it in? With upper wishbone in place it wouldnt slide between transfer box and chassis rail. Other than removing the suspension, the other option was to drop the gearbox rear cross member. Supporting the gearbox on the trolley jack, the cross member was unbolted, lowered, the torsion bar was slipped in and the cross member bolted up again.
Initial torsion bar set-up was by lowering the rear adjustment bolt to its fullest extent then place the bar end housing into the stirrup. At the front end, the upper wishbone was pushed down to the bump stop, the front torsion bar yolk then being positioned on the bar splines to line up with the fixing bolt holes in the wishbone.
The accessible outer fastener was slipped in and the nut screwed on. Not so the inner bolt, its head fouled part of the chassis rail preventing it being fully inserted. Putting aside all thoughts of removing the suspension, a spacer and nut were placed on the bolt partially exposed threads and wound up until the bolt head pulled past the obstruction. This bolt was tightened, both bolts being set to the correct torque.
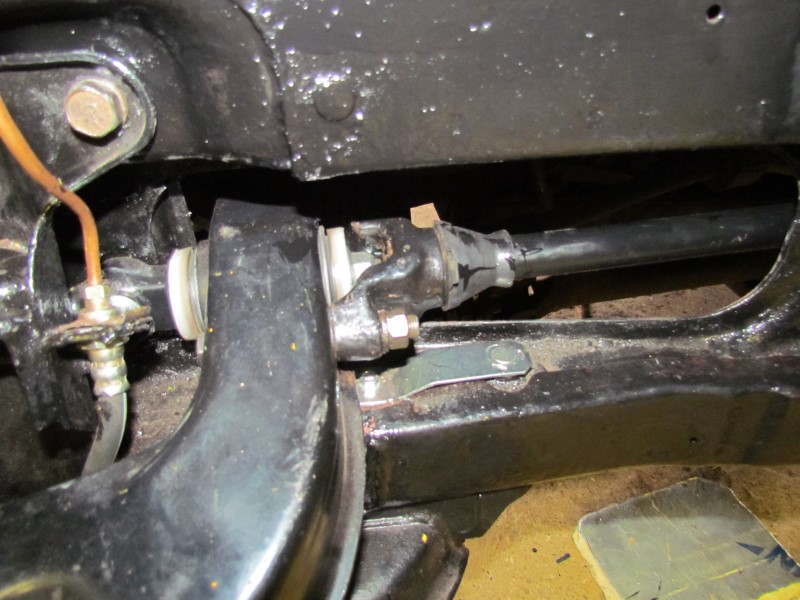
Now the torsion bar was installed, the rear adjustment was wound up a similar number of turns to that of the spare Delica. Ride height can be finalised once the LWB is back on its wheels.
New drop links between the lower wishbone and anti-roll bar were fitted, all fastenings were verified by torque wrench.
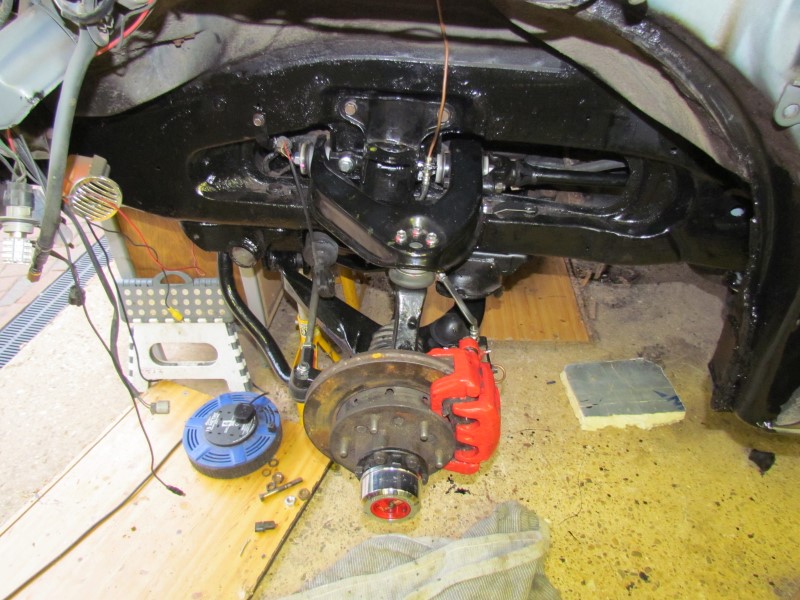
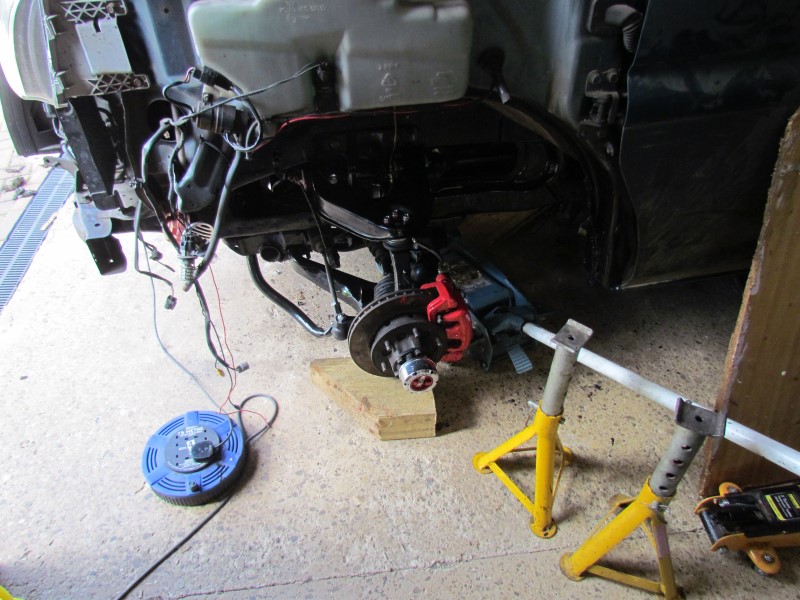
The knucklehub assembly, complete with brake disc and calliper, was next to be installed. New Budweg caliper were installed and given a coat or two of Hammerite gloss.
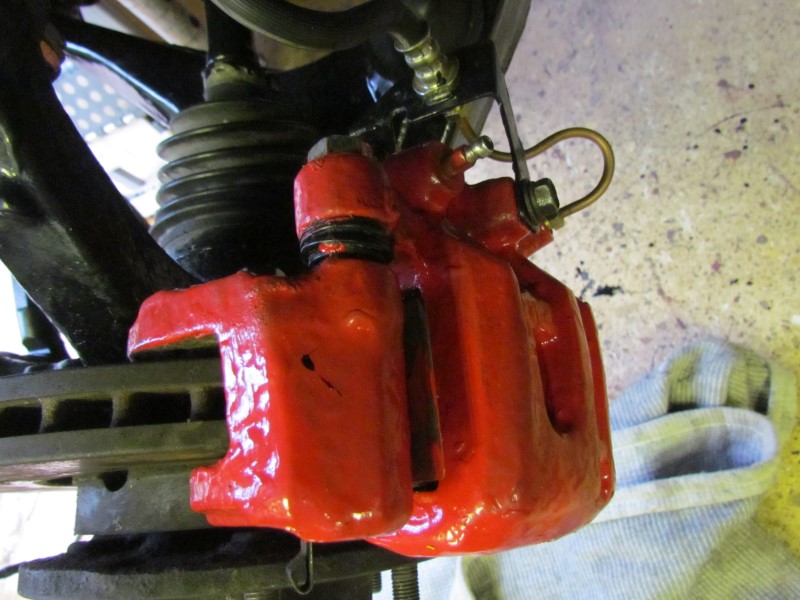
The knucklehub is a heavy piece and needed lifting on the trolley jack.
Again, a somewhat challenging task more so as the brake rotor proved to be as effective as a roller skate support. Firstly, the lower wishbone ball joint needed partial insertion into the knucklehub while the knucklehub was partly slipped onto the axle shaft, the component could then be lifted onto the upper ball joint fitting and secured with a holding nut. Fortunately, the axle shaft splines easily lined up with the hub splines.
Next will be the off side installation and removing the turbo to free up the wastegate.
_________________
Talk the torque
Delica Super Exceed LWB PF8W
Suzuki Grand Vitara V6
Sunbeam Tiger 289
Benelli 750 SEI |
|
| Back to top |
|
|
andyman
Joined: 08 Dec 2012
Posts: 5602
Location: Penrith
|
| Posted: Tue Sep 18, 2018 22:58 Post subject: |
|
|
Total admiration for your determination, resilience and ingenuity!
_________________
Andy C L300 Super Exceed - over 100 smiles per gallon! |
|
| Back to top |
|
|
Lewis
Site Admin
Joined: 25 May 2006
Posts: 16298
Location: Huddersfield
|
| Posted: Wed Sep 19, 2018 13:53 Post subject: |
|
|
Ditto.
_________________
Copyright is retained for all my photos. Please don't copy them without asking permission
Do not blindly go where the path may lead you. Go where there is no path and leave a trail that others may follow!
ルイス |
|
| Back to top |
|
|
Pierre
Lifetime member
Joined: 09 Jan 2014
Posts: 151
Location: Northampton
|
| Posted: Thu Sep 20, 2018 17:41 Post subject: Eureka Delica - more stuff |
|
|
The off-side upper wishbone was installed with too much trouble, the lower wishbone then being eased into the suspension hangers followed by slipping in the rear cam bolt.
Front cam bolt not in the plastic box with all the other suspension bits. Big search of stored Delica stuff but no cam bolt; a second rear bolt was found so it seems an earlier incorrect delivery occurred. Couldnt remember the supplier, no alternative but to fire up the PC and order another. These seem rare items in UK but Febest in Germany had them at a reasonable price. Order arrived quickly, opened the package only to find the supplied bolt was not threaded more emails to sort this out.
So back under the LWB to fit the offside new torsion bar. This time there was no hindrance, the bar ends were fitted, lined up and the front outer yoke bolt popped in. As before, the inner bolt fouled the chassis frame and had to be wound with the technique adopted for the near-side.
So far so good. The Delica could now be lowered off the axle stands and onto 1½ thick timber blocks under the knucklehubs.
About now a realisation dawned that although the Delica weight was effectively taken up by the knucklehubs, the upper suspension wishbones were still in contact with the bump stops. Looks like torsion bars will need some serious adjustment when the LWB is back on its wheels.
The front ECS shock absorbers remain to be fitted with new bushes but so far no success in locating a UK supplier of these bushes. The search continues, possible purchase from the Middle/Far East but computer time needed to search the web. As a last resort, the local Mitsi dealer could be approached but after the £60 charge for torsion bar gaiters, there is a reluctance to give them too much more cash.
Though the shocks are still to be fitted, circuits to the ECS controls could be tested. So, turning on the ignition, dash lights up, flashers flash as stalk had been accidentally knocked, fan motor spins, parking sensors bleep, ECS
. nothing, Waggle ECS switch, still nothing. Ignition off and try again, again nothing so now an unforeseen wiring job is added to the list of works.
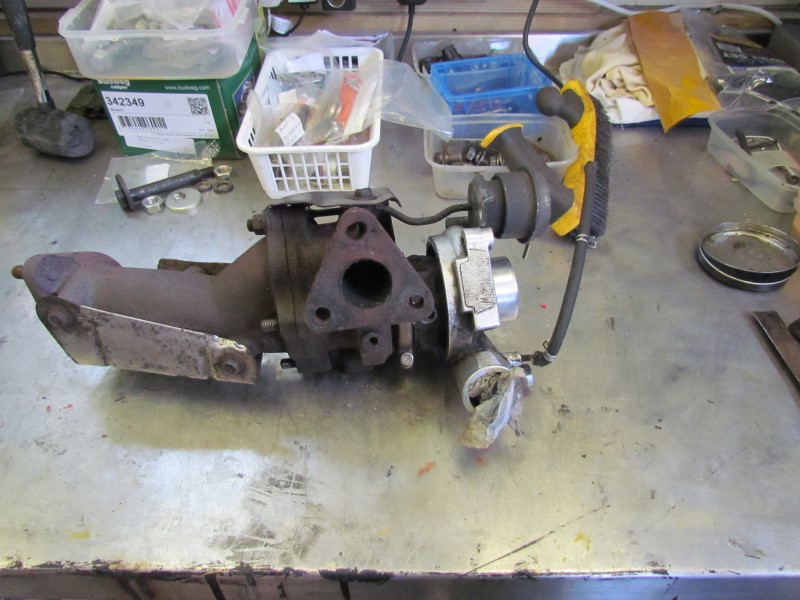
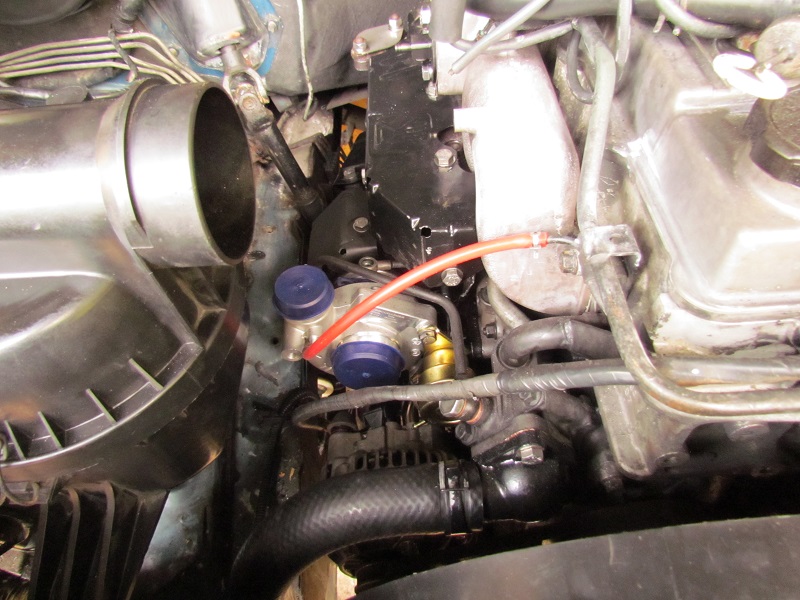
Waiting for suspension parts provided time to focus on the turbos wastegate that refused to be freed by any accepted method. Although copious amounts of various releasing fluids had been sprayed in the general direction of wastegate whilst the Delica was in storage the wastegate remained solid so the turbo needed to come out. Having removed the air filter box, inlet pipes, heat shields etc, etc, the exposed turbo bolts were sprayed with release oil.
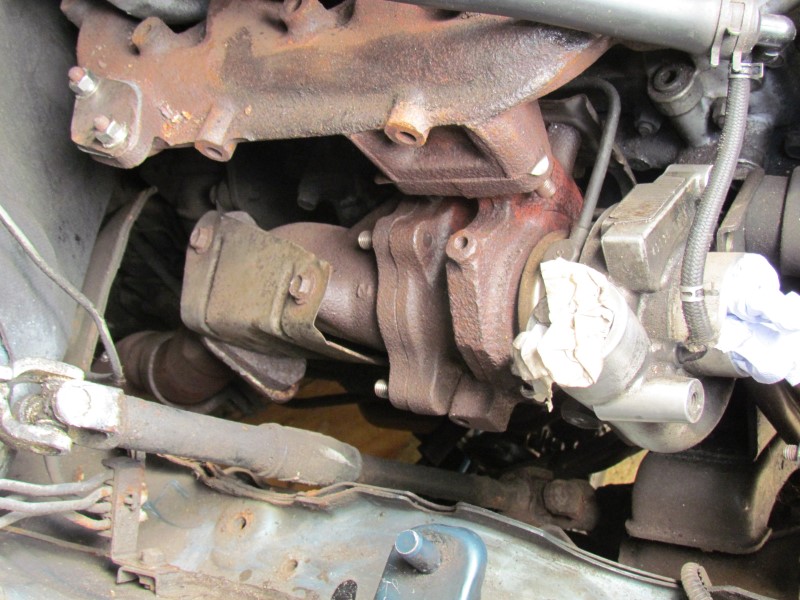
Oil and water feed pipes then disconnected. More release oil on the various fasteners which yielded to 6 sided sockets on the end of a breaker bar all except one, the offender being the rear nut on the underside of the exhaust manifold/turbo flange.
Not enough room to use sockets on ratchets or bars, open-ended spanners would probably slip and insufficient leverage for effective use of a ring spanner. Heat will be the answer, out with the gas blowlamp, heat the exposed stud until nicely red, spray with Halfords Shock & Unlock and then the nut should undo. Wrong, didnt work, presumably the cast iron manifold acted as a heat-sink transferring heat away when the gas flame was removed. By now, the nut corners were becoming damaged so next idea was to cut away the nut. A pneumatic die grinder proved ineffective as limited space prevented grinding stones making decent contact with the nut.
Then, a small pneumatic cut-off tool fitted with a 3 cutting disc was found to have sufficient access to start cutting into the nut. Minimal cuts required to avoid damaging the stud thread, but with the work area out of sight behind the cutter, it was impossible to see if enough metal was removed to free the nuts grip. By using a mirror, it appeared a reasonable, accessible flat was cut across the nut. This could offer a surface where a striking force might be applied. In conjunction with judicious applications from an engineers hammer, a sharpened small cold chisel formed a notch in the nut and by then shifting the chisels angle, the nut started to move. Once freed, it could be removed without further ado. Nut as shown below.

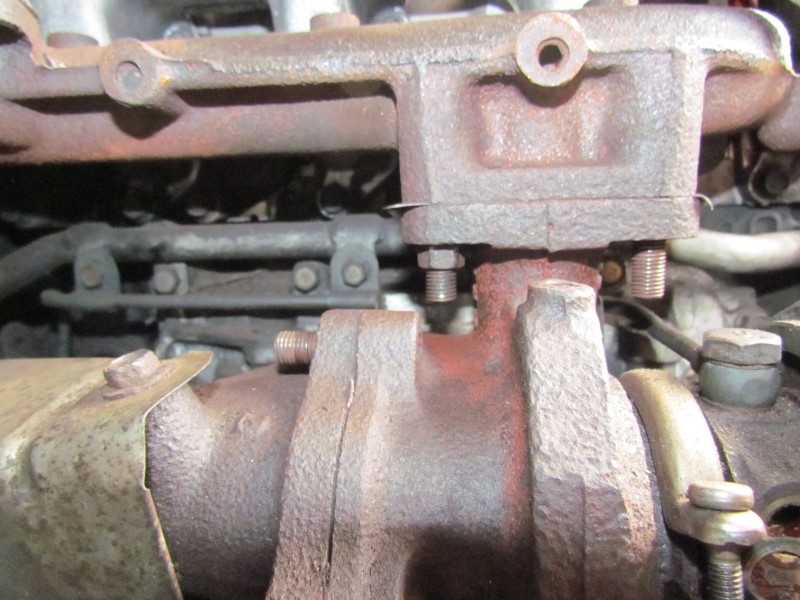
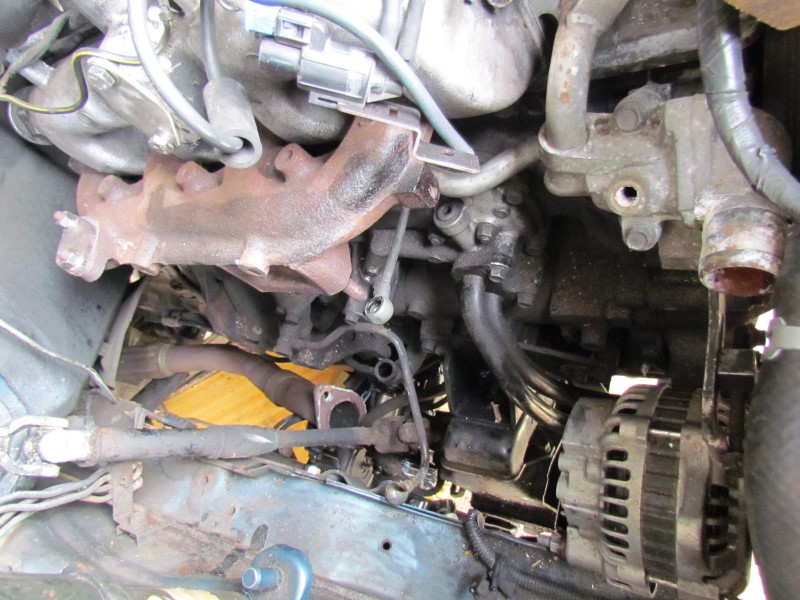
With all fixing now undone and pipes carefully bent back, the turbo was lowered and an attempt made to ease it forward and lift out. No such luck, the alternator being in the way slacken alternator, remove belts, ease alternator back, out came the turbo and onto the bench.
A nice accessible engine bay.
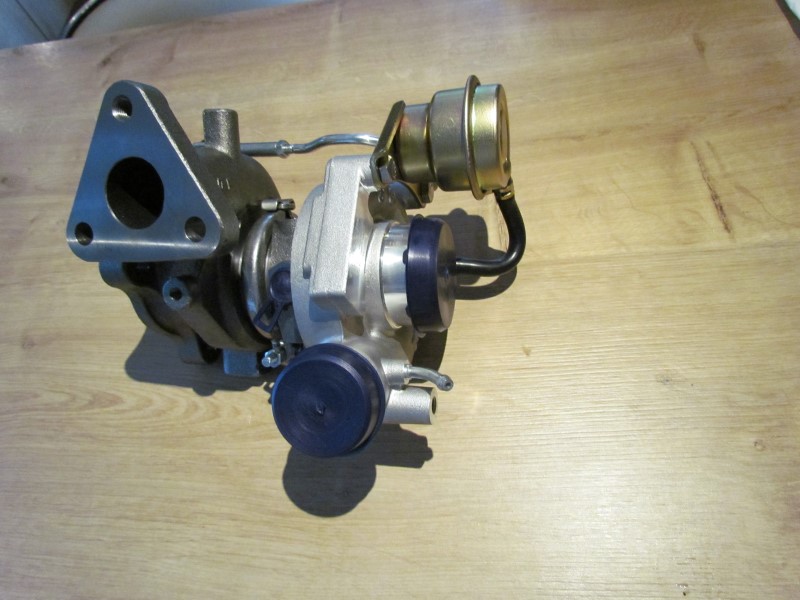
The prolonged application of release had obviously worked as the wastegate moved freely, what didnt move was the actuator. Adding prices for a new actuator to the various gaskets required was somewhat alarming compared with the cost of a cheapie eBay turbo. Looking at Yozas blog about fitting a turbo and after quick email exchange with him, a Chinese turbo was ordered and quickly delivered.
It looks the biz but only time will tell.
As an aside, purchasing a new smart TV freed up the old 46 Sony. Now in the workshop/garage and linked to a PC, it gives clear viewing of large pictures and easy reading of Delica manual texts and other info held on the PC. Wiring diagrams are now a doddle to follow.
Below is a shot of the screen background, a constant reminder of the Delica before work started.
_________________
Talk the torque
Delica Super Exceed LWB PF8W
Suzuki Grand Vitara V6
Sunbeam Tiger 289
Benelli 750 SEI |
|
| Back to top |
|
|
andyman
Joined: 08 Dec 2012
Posts: 5602
Location: Penrith
|
| Posted: Thu Sep 20, 2018 18:35 Post subject: |
|
|
Nice looking beast - fingers crossed that it runs beautifully at the first start-up. You have earned that at least.
_________________
Andy C L300 Super Exceed - over 100 smiles per gallon! |
|
| Back to top |
|
|
YOZA
Joined: 07 Mar 2005
Posts: 2423
Location: The centre of the universe
|
| Posted: Fri Sep 21, 2018 11:12 Post subject: |
|
|
Excellent, wait until you try and put that rubber oil 'return to sump' hose back on to the base of the turbo. 
And you are so lucky, I am not allowed to put carparts on the kitchen table, for work or admiration. :D
Note. Fill turbo oil inlet banjo bolt hole with clean fresh engine oil upon assembly, gives the impeller shaft a bath in oil before initial start up, then the oil pump will kick in, I would change your oil and filter too.
Crack on.
_________________
Artificial intelligence is no match for natural stupidity.... |
|
| Back to top |
|
|
Pierre
Lifetime member
Joined: 09 Jan 2014
Posts: 151
Location: Northampton
|
| Posted: Wed Oct 24, 2018 22:32 Post subject: Eureka Delica - more stuff |
|
|
Work continues, but a bit slower than anticipated.
Meanwhile, my PC decided Windows 10 was not to its liking and threw a biggy, it totalled my email accounts, wouldnt let me download photos, hit and miss about logging onto MDOCUK or fleabay and lost all sense of objectivity. Lost hours/days trying to get it stable and source bits off the internet. Eventually my friendly PC guru managed to sort it after a couple of weeks and it came back running Widows 8 much better.
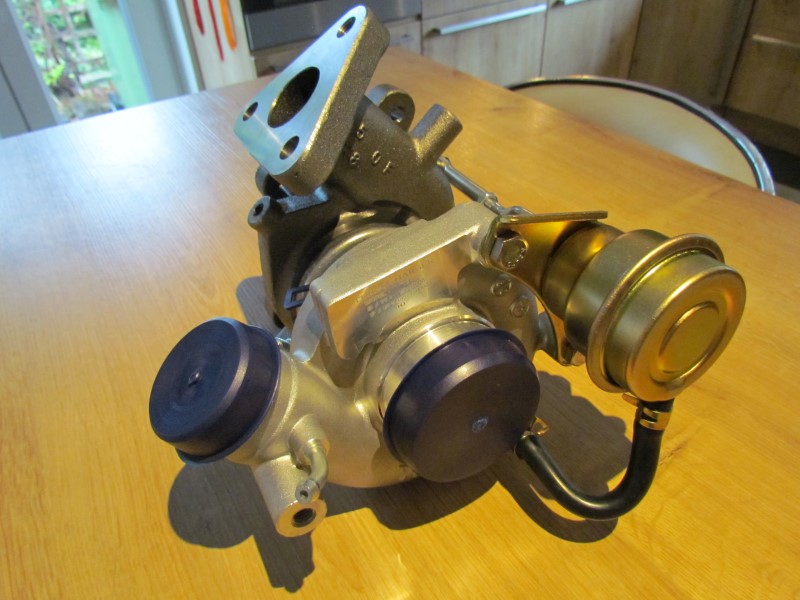
Installing the new turbo resulted in skinned knuckles and profanities. Yoza had commented on the difficulty in connecting the turbo oil drain to the sump inlet pipe, but with a good dose of silicone spray, the bits just slipped together. Jordan and KY Gel comes to mind.
Everything was bolted up when I found part of the heatshield still on the workbench. More profanities but eventually installed.
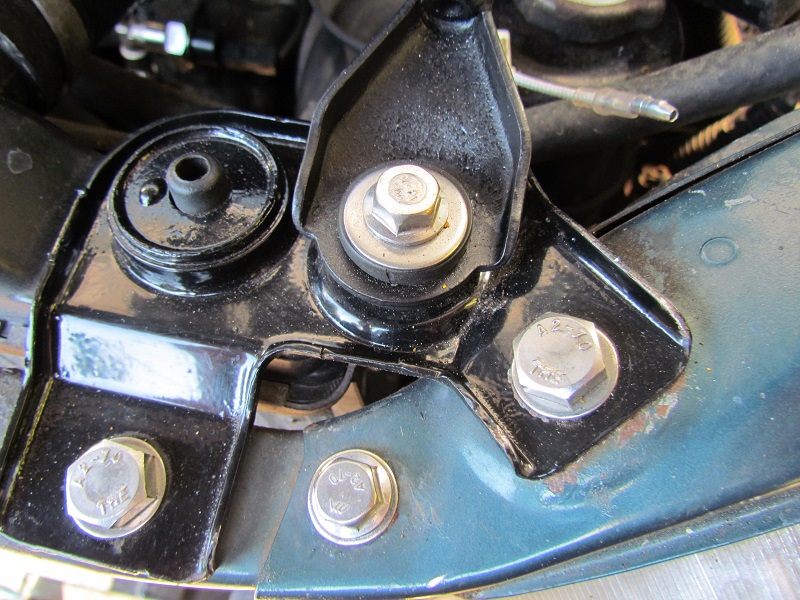
My fleabay powder coating kit is giving some good results as seen on the bracket below, but with only a worktop oven the size of pieces I can coat is restricted.
Bushes for the ECS shocks came via Amazon. Siberian Bushing in Vladivostok were the suppliers and delivery was quicker than some UK companies. The quality seems okay but time will tell. Shocks now installed as shown below.

The previously removed Delica front and wing panels gave better access to work areas.
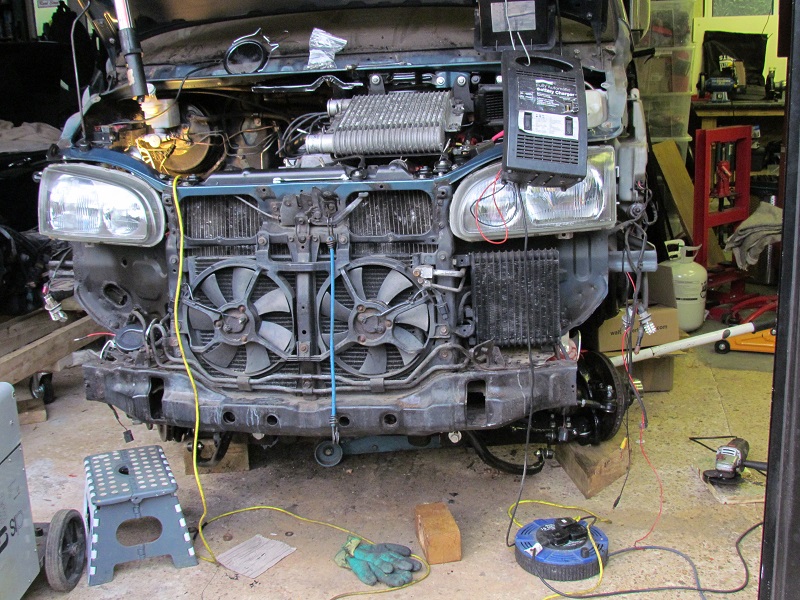
With the heavy work virtually finished, the panels are now reinstalled.
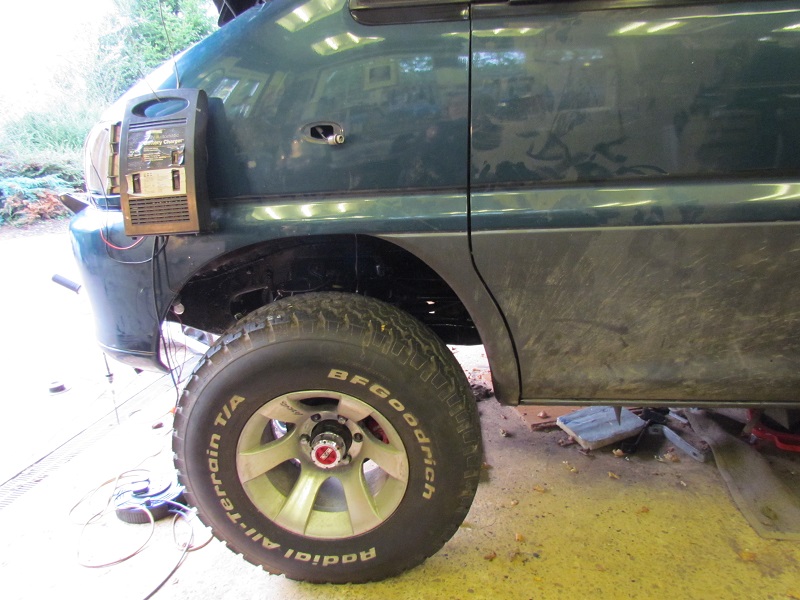
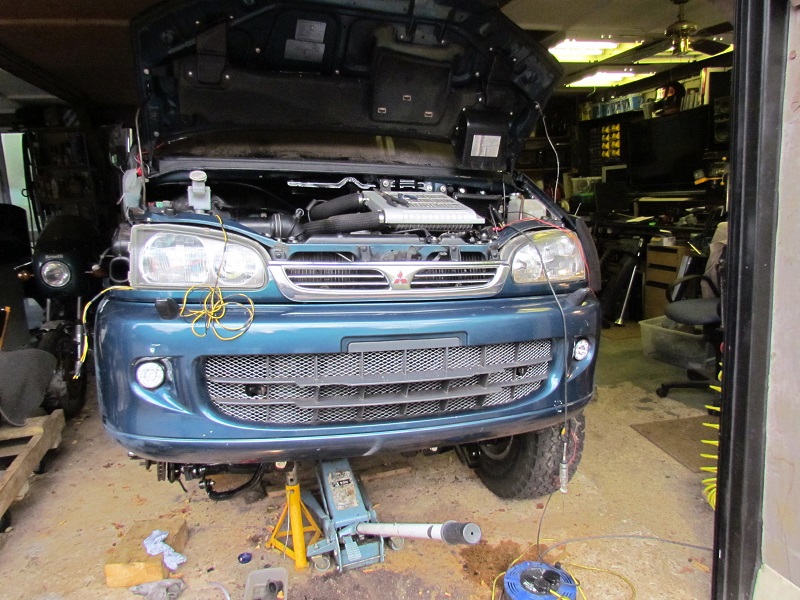
With the wheels on, the Deli was fired up after standing for two years. Awesome exhaust smoke, but then ticked over as sweet as a nut, given a few revs there was a nice whistle from the turbo.
Next stage, start sorting out the wiring. Although the motor starts, somehow all power to the lights, windows, etc has failed. Interesting times ahead.
_________________
Talk the torque
Delica Super Exceed LWB PF8W
Suzuki Grand Vitara V6
Sunbeam Tiger 289
Benelli 750 SEI |
|
| Back to top |
|
|
andyman
Joined: 08 Dec 2012
Posts: 5602
Location: Penrith
|
| Posted: Thu Oct 25, 2018 22:40 Post subject: |
|
|
I think you should nick-name it "The Phoenix". You and your wife both deserve medals!
_________________
Andy C L300 Super Exceed - over 100 smiles per gallon! |
|
| Back to top |
|
|
|
|
|
You cannot post new topics in this forum
You cannot reply to topics in this forum
You cannot edit your posts in this forum
You cannot delete your posts in this forum
You cannot vote in polls in this forum
|
|

